I think one of the most important things for a child to learn from an early age are Social and Emotional skills. In a classroom setting and at home a child is constantly experiencing different situations and as they deal with these situations they are passively learning some social and emotional skills.
We, as adults, caretakers and teachers however can also take a more active role in teaching a child the social and emotional skills. Conscious teaching and commitment to helping and guiding a child in learning how to cope with different emotions will result in a child who is prepared to cope and master a wide range of situations. The role of the adult is to create such an environment where the child feels safe and has trust in freely expressing the different emotions without filter. Then you can gently guide the child(ren) to learn to understand, adjust and express all the different emotions.
So what are social and emotional skills? How do you teach them and why would you need to learn them?
Some examples of what social and emotional learning can be;
- Empathy
- Social skills
- Self-Awareness
- Decisions and choices
- Conflict resolution
- Relationship skills
- Understanding self and others
In the youngest of children it can simply mean understanding the feeling that the child is feeling and as the child gets older, learning to navigate the social situations, understanding the complexity of emotions and showing empathy and willingness to be an active part of a socially functioning group or population.
From an early age it is important to show a child how to cope with the feelings that they experience. We can set up a safe environment for such learning throughout the entire development arch of a child. Actively teaching social and emotional skills will give a child the necessary tools they need to be able to cope in different situations, be resilient, co-operative, adaptive, morally responsible, respectful and so much more.
To the end of this post I would love to gather a library of websites and books which are useful in teaching and learning Social and Emotional skills. Share your favourites in comments or on Instagram or Facebook – sharing is caring!
Scroll down to find the following examples on how to learn social and emotional skills;
- Worry the Bear and The Calm Down Tent
- Feelings Dice
- Emotional Self-Portraits
- How do you feel today?
- I like / I don’t like / I like to wear
- Dodge Cars
Worry the Bear and The Calm Down Tent
A calming down area or space for your child group, classroom or home.
In my preschool group I have always tried to make sure we have space for the individual needs of each child, including a calming down area. One of the most successful ones was Worry the Bear and The Calm Down Tent – an ikea circus tent with a few pillows and a stuffed bear.
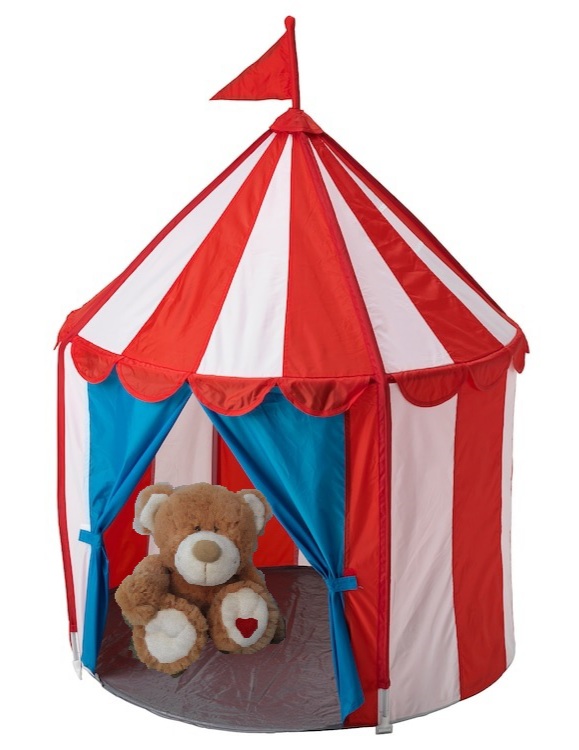
When this calm down area was introduced, we told the children that the tent is for calming down and you can whisper all your worries and things that make you unhappy or sad to the Worry Bear living in the tent. We soon did notice that some children would ask for the opportunity to go into the tent themselves when things got hectic and they needed some quiet time – this is of course optimal concerning self-regulation! For others we had to keep suggesting that perhaps a moment in the tent would be beneficial for them. Some kids wanted to go in the tent, others didn’t care for it much and sometimes things got hectic inside the tent too. At those times we had to remind the children what the tent was for.
Do note, that the tent should Never be used as a punishment, it is not a naughty step or a time-out space. The purpose of the Calm Down Tent is to provide a safe place for a child to go and take some time for themselves, regulate their feelings and calm down. Cuddling the Worry Bear calms the body and soul.
Throughout the years I have had all kinds of kids in my group, sensitive ones, quiet ones, wild ones, all kinds! And for each of them I have always tried to offer the opportunity and space to calm down. Just as each child is a unique individual, each one has benefited from such a space in a their own way.
Here some tips for when you introduce a calm down area;
- Be thorough in your explanation as to what the area is for
- Give real-life examples and role play situations when it would be a good idea to go into the calm down area
- Answer all the questions the children have in the coming days – positive reinforcement is key
- Make a highlighted effort to guide your group in the use of the calm down area for the first couple of weeks
- Only by trial and error will you find the best way to use a calm down area in Your group
- The calm down area is meant to be a positive thing, I repeat – never use it as a punishment. A child should always want to go to the calm down area themselves
Worry The Bear you can introduce for example at your morning circle time. You can role-play how you tell your worries to the Worry Bear. Perhaps the Worry Bear has a voice? Perhaps they will answer the children’s questions at circle time? The sky’s the limit in the performance you want to put in when introducing Worry The Bear!
The purpose of this harmless soft toy is to be a safe and gentle tool for a child to reflect upon and to unload their worries. Some of the children will want to tell Worry the Bear everything whilst others will not care for them that much. The children can choose themselves how much they want to interact with Worry the Bear.
What works for you?
Test and feel how the calm down area works in your group and with the children in your group. You know best. Perhaps it will be beneficial to allow children to bring something with them like a book or their own soft toy or lovey. I also had a soft lamp (from ikea) with mood light that the kids loved touching and looking at in the tent.
Each child can bring something different that works for them. The point of the calm down area is to help a child calm down, soothe themselves and self-regulate.
Feelings Dice
Feeling the emotions with the help of a die.


Show the children the all six emotions and name them. Perhaps some of the children already know which emotions they are? Then cast the die and then repeat the emotion you got!
Feel the emotion together, what does it feel like? How does it feel on your face? Does your body posture change somehow? Does the emotion become stronger if you display it with your entire body? Discuss when you might feel such an emotion. Guide the children with these questions, but try to hear them more. Let the children be the leaders of the conversation. Then continue taking turns throwing the die, practise showing the emotion and continue discussing the different emotions.
Take out some mirrors, small ones of big ones, whatever you have available. The children enjoy greatly seeing themselves express these emotions.
Quick fire round; Sit in a circle and take turns throwing the die. Throw the die, express the emotion as fast as possible and give the die to the next one! This is a bit more action packed and great fun for little ones.
This kind of simple practise does two things, the children learn to label these emotions and it sets the tone in the learning environment you are in. An environment where it is safe to express these emotions with the whole group. This kind of activity tells each child that their emotions are welcomed, they may test their boundaries and that it is ok to feel different feelings and express them.
When a child feels safe to express their feelings they will start to understand the range of them and learns to process them in a developing way.
Emotional Self-portraits
Media of choice = Camera – What do you look like when expressing feelings?

These emotional self-portraits are fun to do with your group of children. Before this activity and craft, we had already prepared by talking about different emotions, what they are and how they are expressed. We had also practised the above dice game and with mirrors.
We set up a photo session with my preschool group. I gave them different options for emotions “Do sad!”, “Do Happy!” and so on. Some of the children had their own favourites they wanted to have pictured and others needed a bit more encouraging. Some wanted to look in the mirror first and others wanted to just go silly in front of the camera. I tried to get as wide a range of emotions as possible from which we then chose the best ones.
I made a pre-selection (framing, blurriness, repetition, range etc.) and then offered each child a few choices to pick from. Their picture was then glued on an A4 piece of card stock and the children got to decorate the edges. For the benefit of the adults looking at the display I also printed the names of the emotions.
This was a super popular display board for the rest of the school year. We did this towards the end of term 1, Novemberish and it was hung up on the wall until Summer break. I also hung a full-body mirror next to this display as it was so popular amongst the children. They kept on coming back looking at themselves and each other, labeling the different emotions, repeating them themselves and even having full on conversations about the different emotions and the different experiences and stories the children had involving them!
When you physically hang the feelings on the wall, it signals to the child that this is a safe place for it.
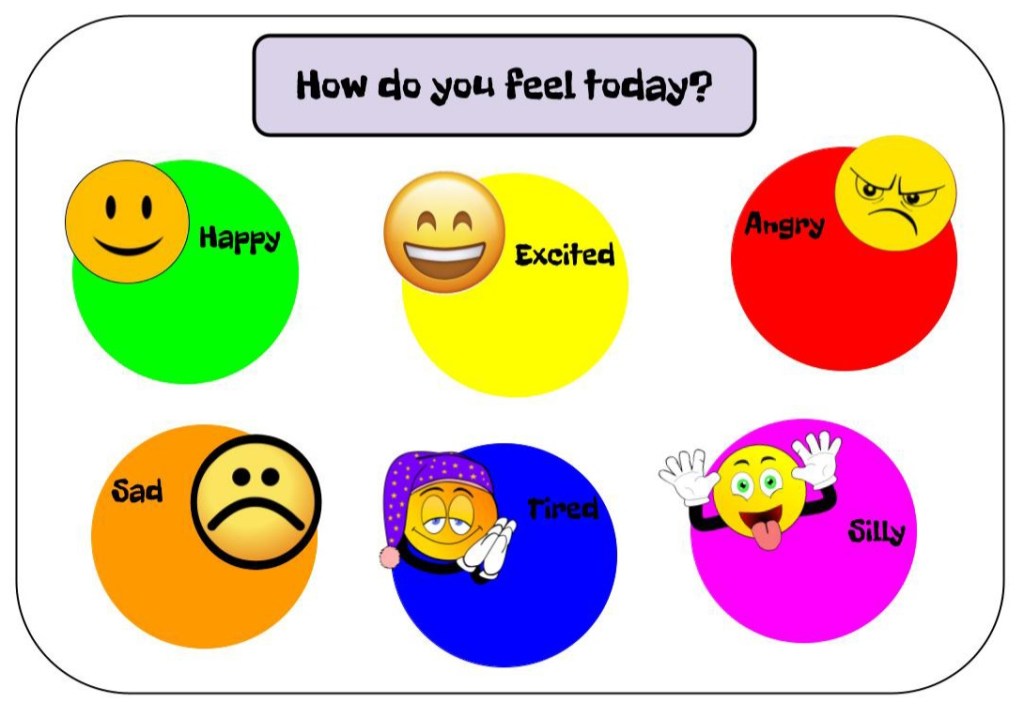
How do you feel today?
Examining your emotion in the morning and in the afternoon.

This display is easy to set up, I had mine hanging right by the entrance as all the children come in in the morning.
You need;
- Your choice of emotions (my choice is pictured below)
- Same amount of circles or any other shape in cardboard
- Picture card of each child (I laminated mine)
- Blue-tack
Hang the circles in a visible place with pictures of the emotions (again, the names are in writing mainly for the adults). I had a mini-whiteboard with all the children’s pictures on the side of this where we would place all the pictures before the next day started.
We showed the display to the children and went through all the emotions with them. We had a chat about what the feeling feels like, when you might feel like it and practised expressing them too. We then kindly asked the parents to help their child to place their picture on their chosen emotion each morning.
In the afternoon we would revisit the display and ask the children whether they still feel the same and if not, where they should be moved to? If they wanted to move, we would also then examine a bit as to what were the reasons why they changed? What happened in their day that made them change their emotions? Sometimes happy things happened and sometimes sad things happened, but the children still enjoyed greatly the realisation that throughout the day you can indeed have a range of feelings!
Observations
When we set this up in my classroom, we noticed quickly that we had to reinforce the parents views more than the children. The parents kept trying to convince the children that surely they are happy or excited to come to preschool! But we gently kept on guiding them that the children absolutely do not need to be happy when they arrive, we all have bad mornings sometimes, and perhaps we can do something that will turn that frown upside down. The parents did finally understand that it is ok for their child to arrive just as they are, there’s no need to pretty up anything 😉 Often those parents would then have a happy relief as they arrived for pick up and noticed that their child had moved from sad to silly or from tired to excited. Sometimes it was the other way around and my hope of course is that the children then had a convo with their parents about why the day ended in a sad or tired way.
This activity was a great conversation starter and kept the discussion about emotions alive all the time. We had good talks about how negative can become positive and the other way around. Most importantly we tried to relay to the children that it is ok to come exactly as you are and then pass some tools to them so that they are empowered in their own day.
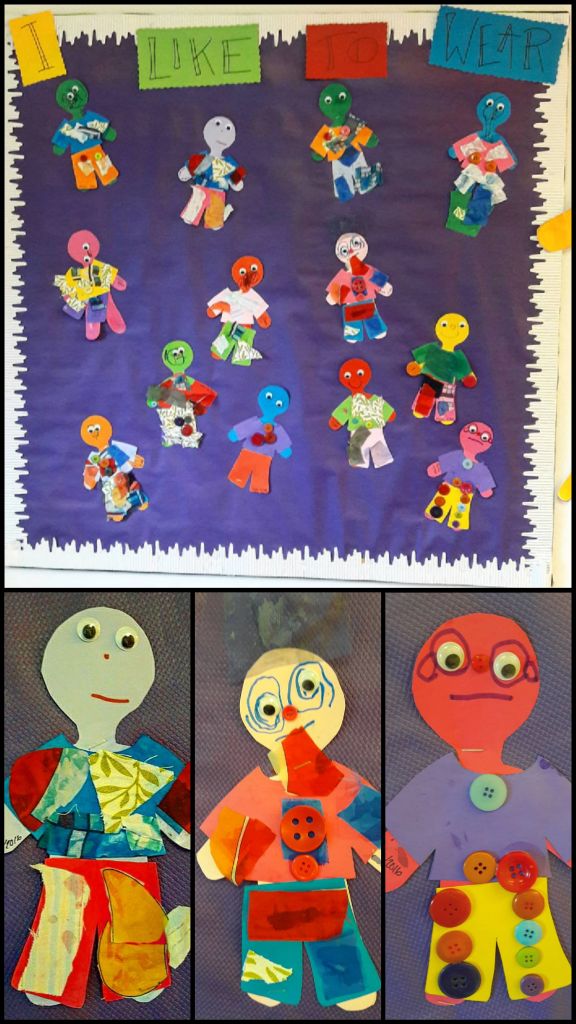
“I like / I don’t like” and “I like to wear”
Picking and choosing things you like and don’t like.
These are lovely crafts to do with the little ones. We got a pile of magazines and toy catalogues as a donation, so I decided to make this “I like” / “I don’t like” craft.
You need:
- Two pieces of card (I used A5 size one rectangle and one cut into a heart)
- Pictures from magazines, stickers, newspapers etc.
- Fabrics and buttons and/or other things from the haberdashery
- Glue
We ripped entire pages of the toy catalogues and pre-cut a variety of pictures. Depending on each child’s scissor skills they could pick the pre-cut pieces or cut their own.
First the children were encouraged to pick pictures that they like. Those were glued onto a heart cut from cardstock. When their heart was full, we asked the children to pick pictures they don’t like and those pictures were glued onto an A5 sized piece of cardstock. I chose on purpose different kinds of pictures from different sources and used the same selection for both the choices.
Perhaps my group just happened to be more positive as I did notice that the “I like” heart was much more full than the “I don’t like” card. Maybe it is more fun to put on things that you like and you don’t really want to focus on things you don’t like anyways, right!
When the cards were finished and the glue had dried, each child got to present one thing from each of their cards to present to the rest of the group explaining what they like most and what they like least and why. The children chose that they did not want to display the “I don’t like” cards, so at the end of the day they were shown to parents and they either ended up in the bin or the children took them home. Perhaps they had a good conversation about it at home?


“I like to wear:” – craft is very similar to the “I like” craft. Based on the child’s scissor skills they cut their own human shape paper doll or they used a pre-cut one. We had a pile of different fabrics and buttons that we loaded on the big tables and let the children cut and use as they pleased.
We encouraged the children to choose what they like to wear based on the look and feel of the fabrics; what colours do they like, is there a special fabric feel they like and so on. We assisted the children only when requested in getting the pieces they wanted, for example with getting a certain pattern or size, just to keep encouraging the thinking process and discussion of things they like in these materials. Some of the children took two pieces of fabrics, glued them on and wanted to go play whilst others were carefully choosing colours and shapes and matching things in their own unique way. We even got a few requests at the end of the day if they could add a button here or glue on another piece of colourful fabric.
We were happy to see how the children were observing the clothes they were wearing that day and were discussing with us and each other whether they liked them or not. Some were very pleased with their colour combinations – some were special indeed – some proudly exclaimed that they had chosen their own clothes today! While others bluntly commented that their mom got angry with them and made them wear “this”. 😀
The objective for these “like” crafts was to awaken discussion and study what we like and what we do not like and why. This was also a great way to awaken tolerance amongst the children: Everyone likes different things and that’s ok!
Dodge-Cars
The more polite version of Bumper Cars 😉
A child under the age of 4 has not always quite realised that the world does not revolve alone around them. Here is a great exercise for a gym lesson, it practises the child’s self-awareness, personal space and being mindful and tolerant towards others.
We know Bumper Cars from the amusement parks, right? This is the opposite version of it: instead of bumping into others, you need to Dodge!
This is how:
Define an area – we had a large gym in use, so I used benches and cones to mark the area.
Define the “Parking lot”, for example a bench.
Take as many hula-hoops as you have children in the group.
When you have set up the area, place the hula-hoops on the floor inside the area, apart from each other. Ask the children to go and stand inside one. Before touching the hoops, give the children instructions:
- The hula-hoop is your “car” – it is Your personal space
- The aim of the game is to Dodge others, avoid touching anyone and all times
- You may drive around the space freely, but make sure you do not run into or touch others
- Even if by accident you touch another “car”, you have to go to the parking lot to count to ten and then return back to driving around
Notes:
- Define a large enough area where the children can easily avoid and dodge each other or send just a small group driving at a time
- For some children it is difficult to process that even for an accident you have to go to the parking lot, which is why it is important that you relay to them clearly that the parking lot is not a punishment, it is a reset for your thoughts to make sure that you focus on dodging
If it works for your group, put on some music – driving is always more fun with good background music!
If the game goes well and dodging starts becoming too easy, you can up the difficulty level by making the driving area smaller.

